Typical PB System Cross Section
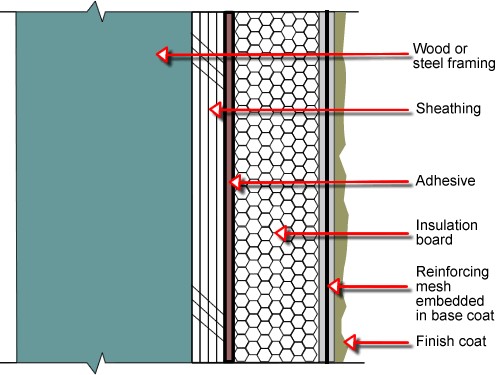
Note: Application of EIFS to masonry substrates is similar.
Typical PB Insulation Board Layout
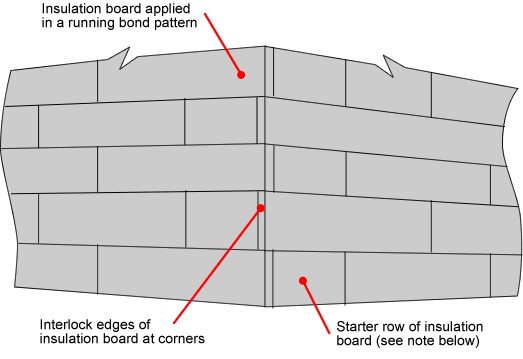
Note: On sheathed substrates offset insulation board joints from sheathing joints.
Typical PB Aesthetic Groove
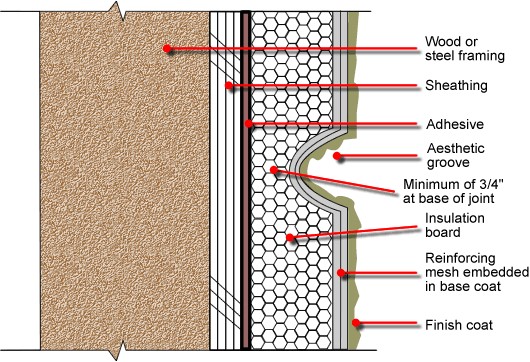
Note: Application of EIFS to masonry substrates is similar.
Offset insulation board joints from aesthetic groove.
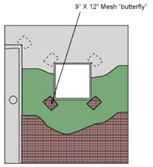
Typical Reinforcing Mesh Butterfly Application – PB
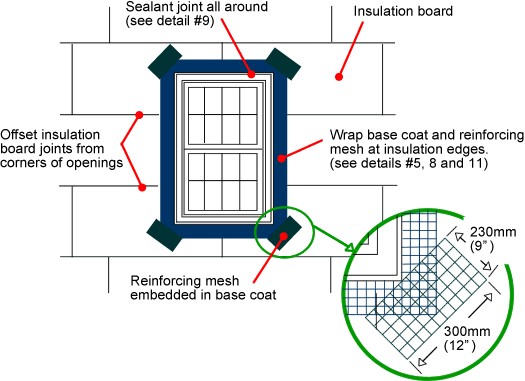
Note: Typical at windows, doors, etc.
Butterfly Reinforcement Mesh
Typical PB Termination at Foundation
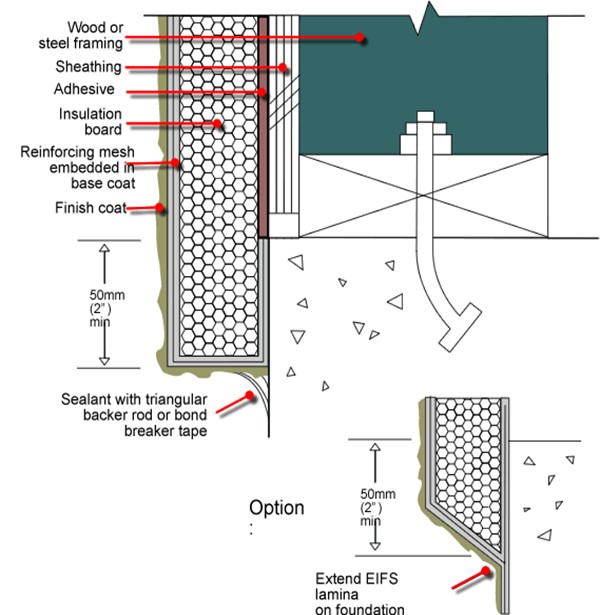
Notes: EIFS must terminate a minimum of 200 mm (8″) above finished grade. Application of EIFS to masonry substrates is similar.
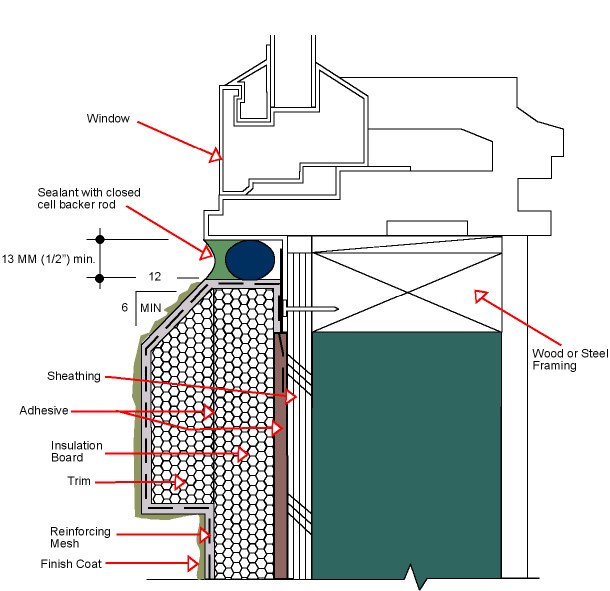
Typical PB EIFS Termination at Window Jamb (with trim)
Note: Application of EIFS to masonry is similar.
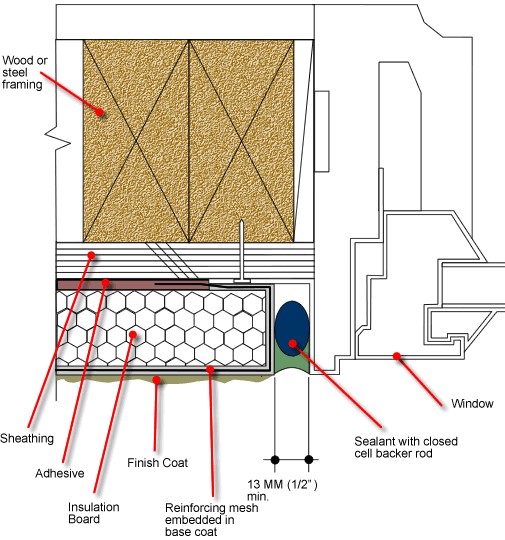
Typical EIFS Termination at Window Head (with trim)
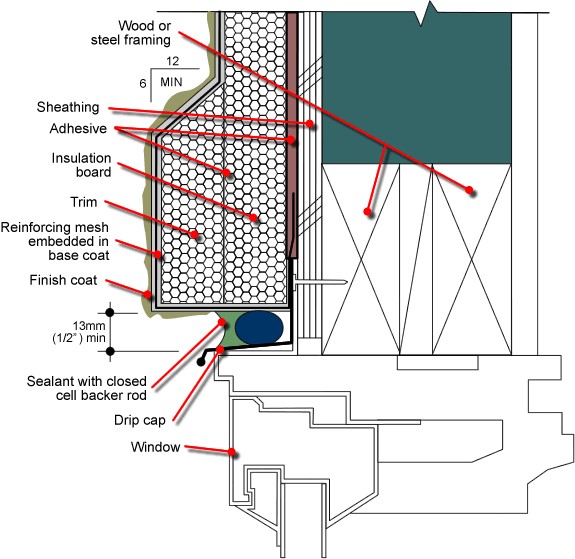
Notes: Application of EIFS to masonry substrates is similar.
Flash in accordance with window manufacturer’s recommendations.
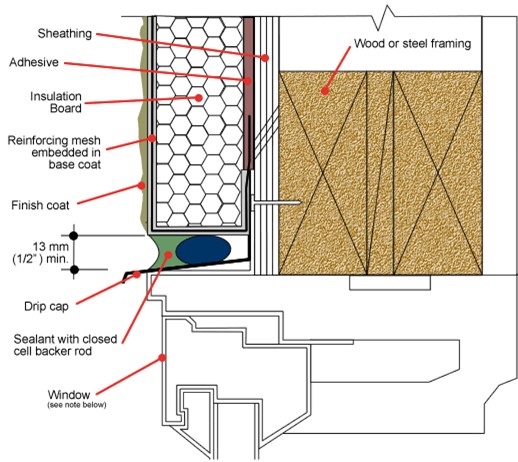
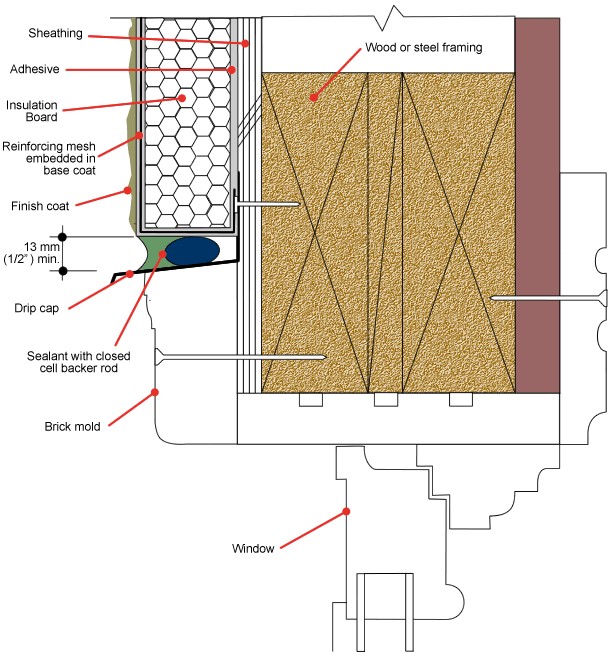
Typical PB EIFS Termination at Window Sill (with trim)
Note: Application of EIFS to Masonry substrates is similar.
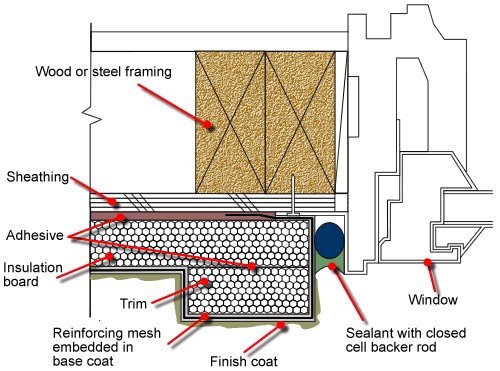
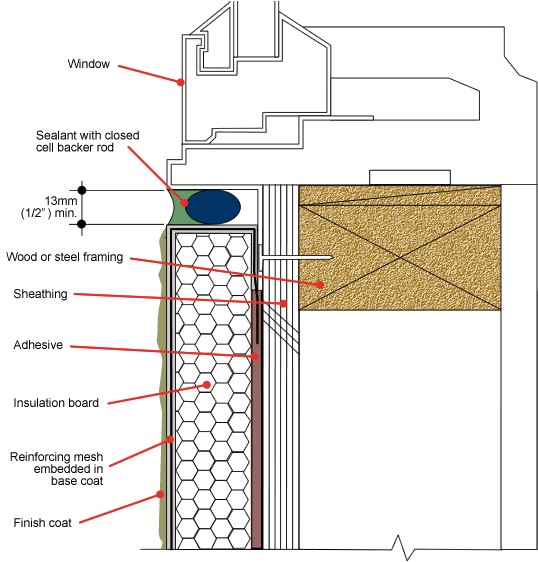
Typical PB EIFS Termination at Window Jamb (no trim)
Note: Application of EIFS to Masonry substrates is similar.
Typical EIFS Termination at Window Head (no trim)
Note: Application of EIFS to masonry substrates is similar.
Note: Flash in accordance with window manufacturer’s recommendations
Typical PB EIFS Termination at Window Sill
Note: Application of EIFS to masonry substrates is similar.
Typical PB EIFS Termination at Window Jamb (brick mold)
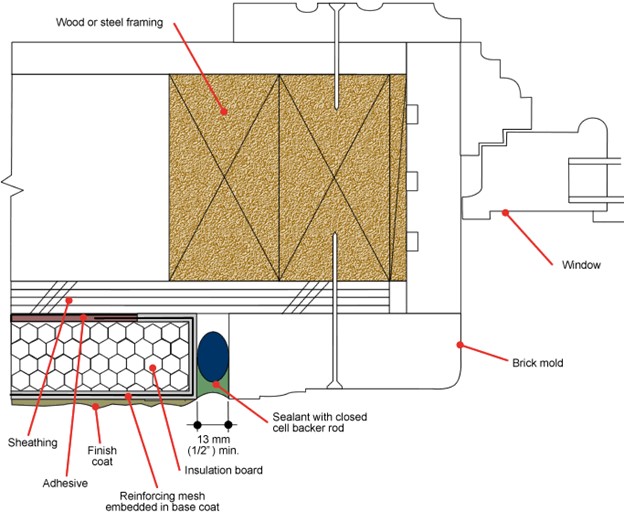
Note: Application of EIFS to masonry substrates is similar.
Typical PB EIFS Termination at Window Head (brick mold)
Note: Application of EIFS to masonry substrates is similar.
Typical Termination at Wood Window Sill (exposed sill pan)
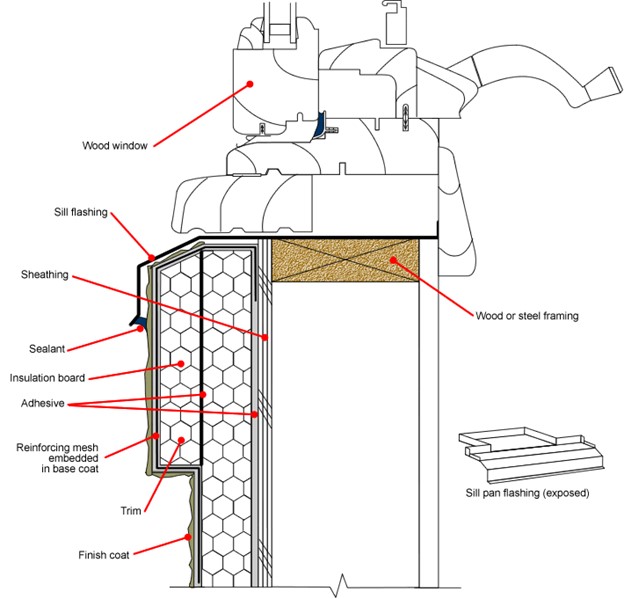
Note: Application of EIFS to masonry substrates is similar.
Typical Termination at Wood Window Sill (concealed sill pan)
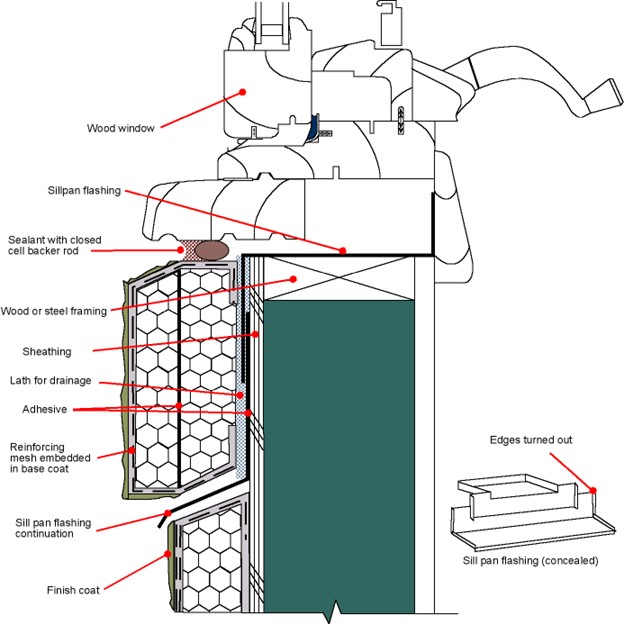
Note: Application of EIFS to masonry substrates is similar.
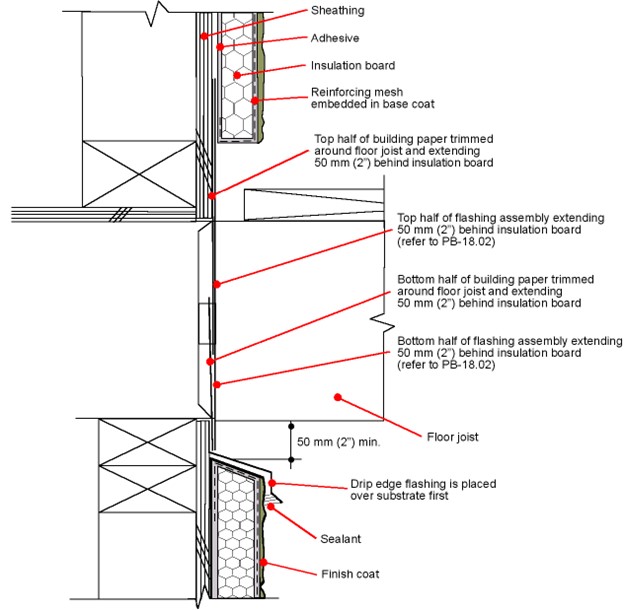
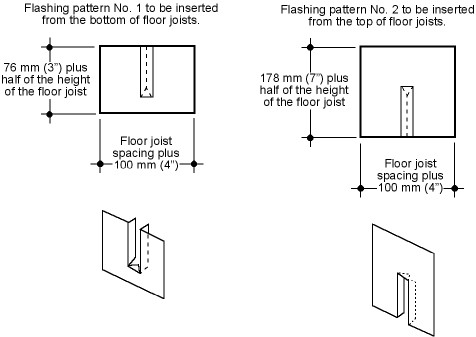
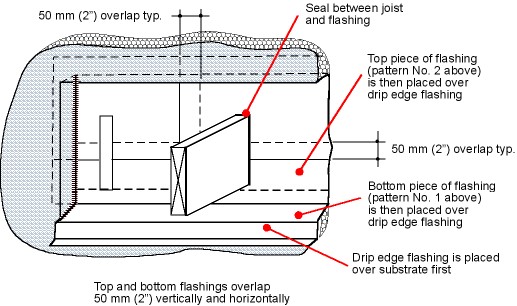
Typical Expansion Joint Detail at Floorline
Note: Application of EIFS to masonry substrates is similar.
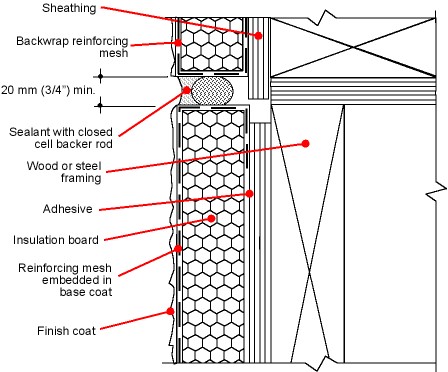
Typical Termination at Deck – Cross Section
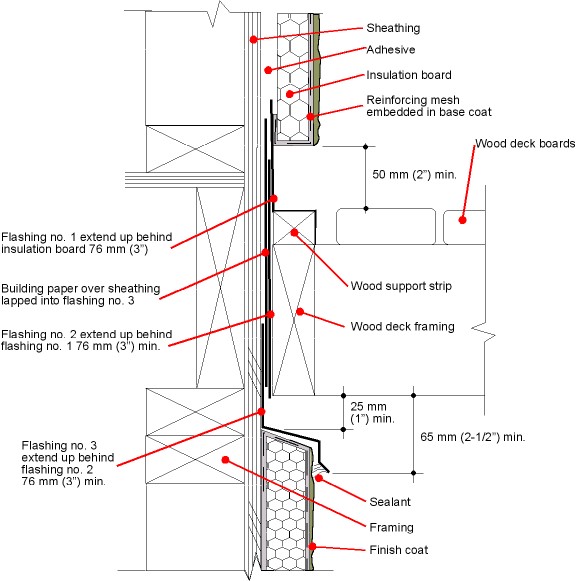
Notes:
- Refer to below image for deck cutaway detail.
- Application of EIFS to masonry substrates is similar.
Typical Termination at Deck – Cutaway
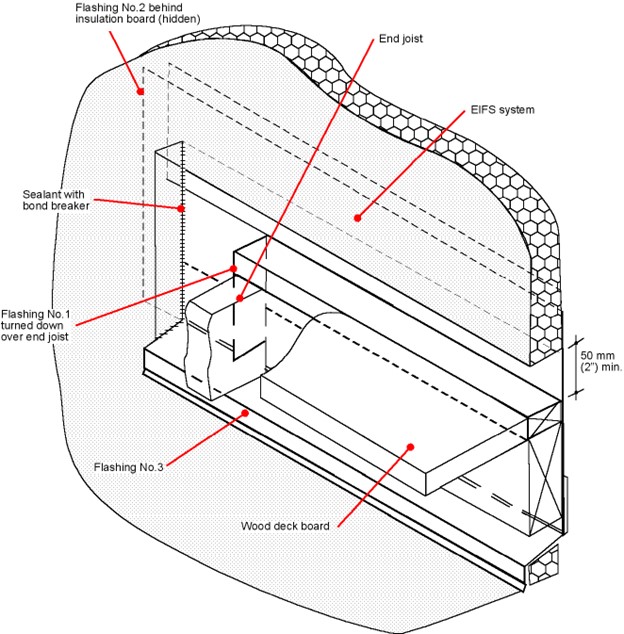
Note: Refer to previous image for deck cross sectional detail.
Typical PB Termination at Cantilever Deck
Notes:
- Application of EIFS to masonry substrates is similar.
- Refer to below image for deck cutaway detail.
Typical PB Termination at Cantilever Deck – Cutaway
Note: Refer to Deck – Cross Section image above.
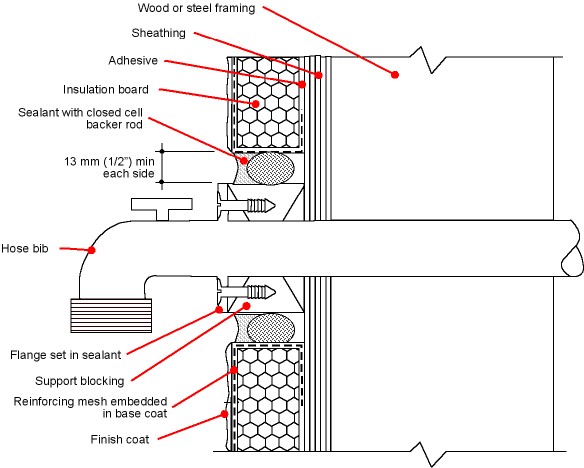
Typical PB Hose Bib Penetration
Note: Application of EIFS to masonry substrates is similar.
Typical PB Attachment of Downspout
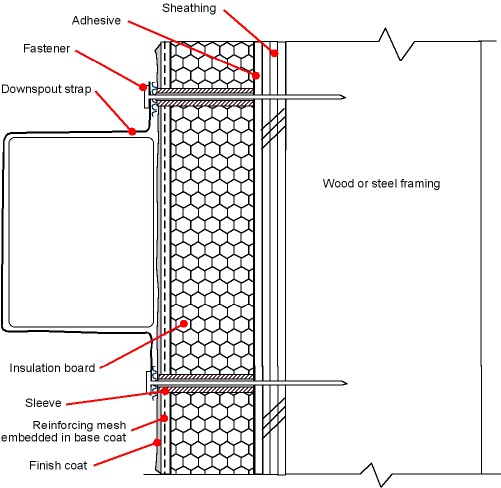
Notes:
1) Application of EIFS to masonry substrates is similar.
2) Sealant must be applied between downspout strap and EIFS lamina.
Typical Penetration

Note: Application of EIFS to masonry substrates is similar.
Typical PB EIFS Termination at Dryer Vent
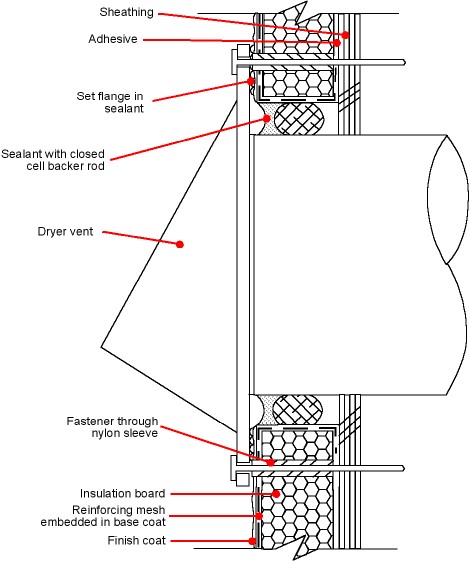
Note: Application of EIFS to masonry substrates is similar.
Typical PB Outdoor Light Fixture Installation
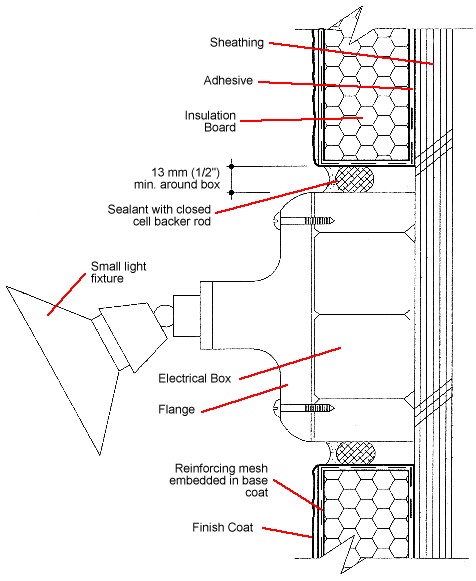
Note: Application of EIFS to masonry substrates is similar.
Typical PB EIFS Termination at Soffit/Gable End

Note: Application of EIFS to masonry substrates is similar.
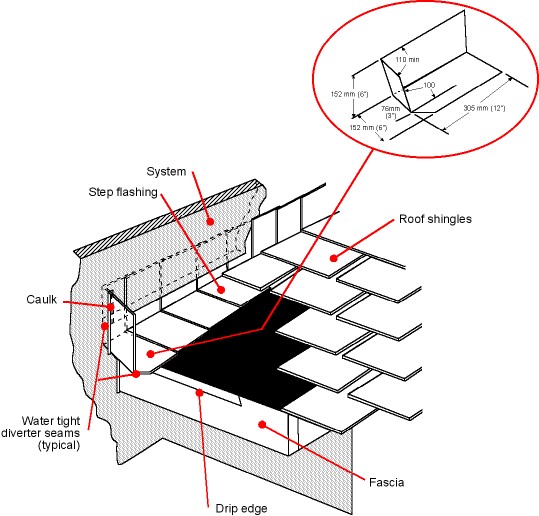
Typical PB Roof Flashing with Diverter
PB or Barrier or Face Seal-EIFS and MD-EIFS base coat installation considerations:
- Mix per manufacturer’s specifications.
- Do not use frozen materials.
- Do not apply to frozen or frost covered surfaces.
- Wall surfaces must be clean.
- Do not apply in direct sunlight on hot days.
- Maintain wall surface above 40 degrees F for 24 hours following applications.
- Let fully cure prior to installing finish coat.
Finish Coat installation considerations.
- Mix and apply finish coat per manufacturers’ specifications.
- Do not use frozen materials.
- Do not apply to frozen or frost covered surfaces.
- Wall surfaces must be clean d cured.
- Do not apply in direct sunlight on hot days.
- Maintain wall surface above 40 degrees F for 24 hours following applications.
- Install sealant per Manufacturer’s installation instructions.